
Smart doorbells such as Ring, Nest and Arlo have become all of the rage in the last couple of years with promises of real-time press and motion notifications, two way communication and a camera to see who’s there. On the whole, they work well but often have a number of disadvantages to a regular old doorbell…
- High initial purchase price.
- Ongoing monthly cloud storage costs for video and recordings.
- Annoying notifications for motion events when people walk past.
- Frequent charging (compared to their “dumb” counterparts) & in turn downtime during battery charging.
After getting a lot of emails offering discounts on Ring hardware over the Christmas period and having a lot of time during the COVID-19 outbreak, I thought to myself, why can’t I just use my existing “dumb” wireless doorbell but add my own “Smarts”. I set about seeing what protocols they use and if I would be able to read the RF signals they produce.
My Doorbell
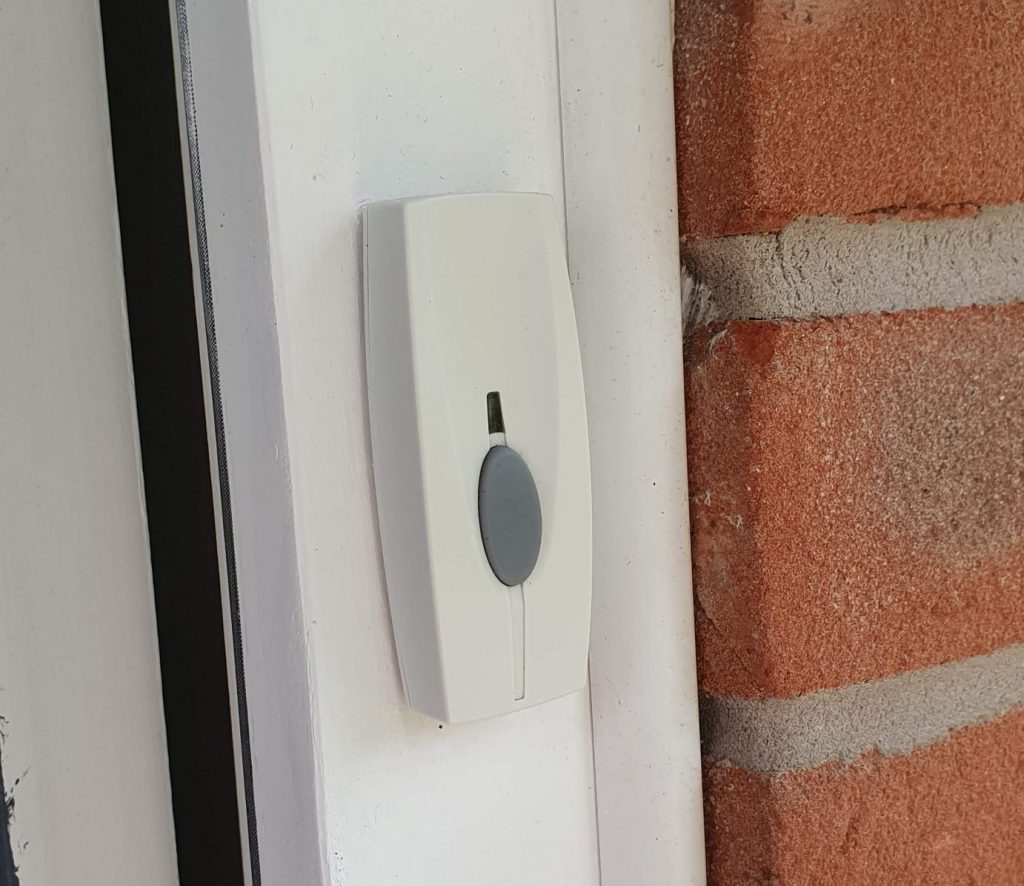
A quick look on the back of one of my £20 Byron BY102 Doorbells Chimes (that I purchased almost 6 years ago with no battery changes yet) confirms my suspicions that it communicates over the 433.92MHz radio frequency. As luck would have it, I already have a RFXtrx433E transceiver that I use for communicating with my Gen 1 LightwaveRF light switches that I can reuse to listen for the Byron press event.
Capturing the press Event
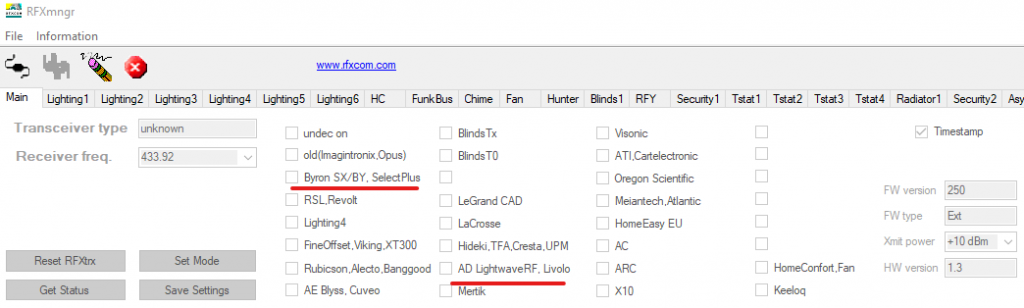
First of all I needed to configure the RFXtrx433E to listen for the Byron protocols from the RFXmngr application. Initially, I only had the LightwaveRF protocol enabled but I was able to enable Byron SX/BY, SelectPlus functionality easily by checking the option required and clicking Set Mode to write the configuration back to the device.
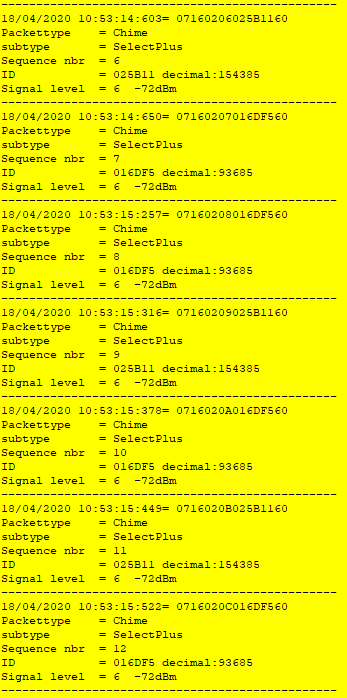
Now, whilst the Chime was plugged in to my laptop I decided to give it a test to make sure it could pick up my doorbells presses. Go to your doorbell and press the button (might be worth unplugging the chimes during this phase of testing – I know it annoyed me!). If you have a supported doorbell you should get some data in the console similar to this;
Configuring Home Assistant
Now you know your doorbell is supported by the RFXtrx433E you can go ahead and connect it to your Home Assistant server. If you haven’t already configured your RFXtrx433E to work with Home Assistant, I suggest you visit the integration page and enable it on your system.
Once you have the RFXtrx433E up and running in Home Assistant you need to add a sensor to your configuration.yaml. I initially tried this with both a switch and a binary_sensor which the rfxtrx component supports but did not have any luck. Initially, your sensor configuration should be as follows in order to find out your device identifier;
sensor:
  - platform: rfxtrx
    automatic_add: true
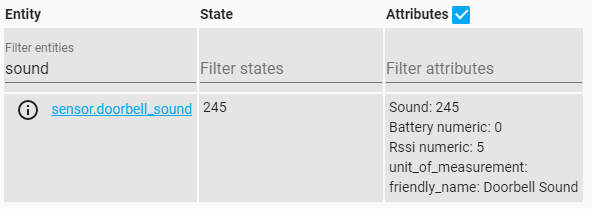
Save your configuration.yaml and restart your Home Assistant instance. Once you’re back up and running you can now go press the button on your doorbell again. The rfxtrx integration will pick up the press event and create a new entity with a name similar to sensor.07160201016df550_sound which can be found on the States tab in Developer Tools. Filter down your entities by searching for “sound” in the list and you should have a result similar to below;
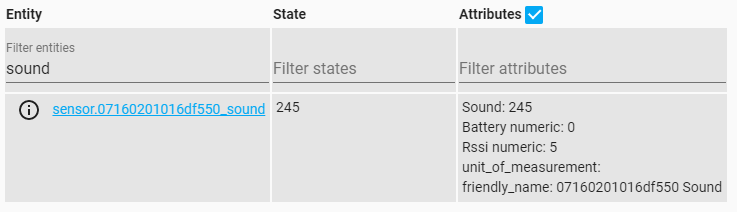
As you can see the sensor has a hexadecimal string as part of its name. This is the identifier you will need to add to your configuration in order for the entity to persist across reboots and use in your automation’s and scripts.
Copy down your identifier (the 07160201016df550 part from above) and go back to your configuration.yaml. Replace your sensor configuration you had previously with the following (remembering to replace my identifier with yours);
sensor:
  - platform: rfxtrx
    devices:
      07160201016df550: # <- Your identifier here
        name: Doorbell
        fire_event: true
        data_type:
          - Sound
          - Battery numeric
          - Rssi numeric
Again, save your configuration and restart your Home Assistant instance. You should now have an entity that exists without needing your doorbell to be pressed (what the automatic_add property did) with a name of sensor.doorbell_sound.
One thing to note is the parameter in the configuration called fire_event. Unless this option is set, Home Assistant will not throw a new event every time the button is pressed. This is because the state of the device does not actually change upon a press. Enabling this ensures an event is fired every time the same signal from the doorbell is received.
Sending a notification to my phone
Now everything is hooked up in Home Assistant, I want to show a notification on my phone so that I know the doorbell has been pressed. First things first, I will use the official Home Assistant mobile app as the means to send the notification. Instructions to set this up can be found here.
In order to get a notification on my phone, we are going to setup an automation that listens for the signal_received event on the doorbell entity. This can be done through the UI or in your automations.yaml. I did mine through the UI but it will produce yaml similar to the following in your automations.yaml;
id: '1587206857684'
  alias: Doorbell Pressed
  description: ''
  trigger:
  - event_data:
      entity_id: sensor.doorbell_sound
    event_type: signal_received
    platform: event
  condition: []
  action:
  - data:
      message: Someone's at the door!
      title: Doorbell
    service: notify.all_devices
As you can see, the trigger for the automation is receiving the signal_received event for the sensor.doorbell_sound entity. This then runs the action notify.all_devices with the defined title and message to show the notification on everyone in the households phone, similar to this;
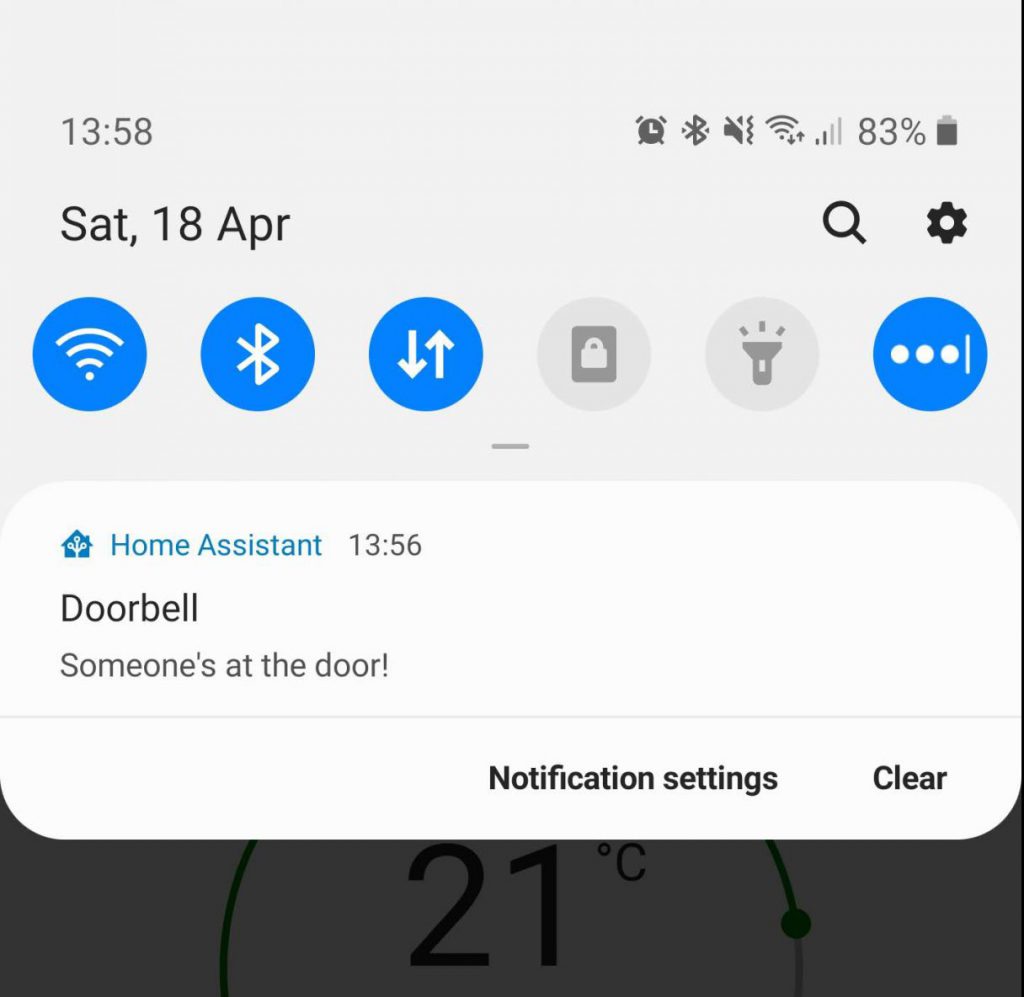
The notify.all_devices service can be achieved by creating a group in your configuration.yaml similar to the following but replacing my devices with all of your mobile app services that you want in the group;
notify:
  name: ALL_DEVICES
  platform: group
  services:
    - service: mobile_app_sm_g973f
    - service: mobile_app_sm_g975f
Endless possibilities
The notification is just the start of the possibilities here. You could easily add automation’s to do things like;
- Add a camera to take a photo of who’s at the door and send it along with your notification.
- Play a custom message or sound through your smart speakers instead of using the chimes included with your doorbell.
- Pause music and or TV that is playing in the house automatically so someone can answer the door.
I have this exact doorbell, and im wondering if it’s possible to do the same thing only using a 433mhz receiver such as the SRX882 with a ESP32. So far I am having inconsistent results.